How to add stars and clouds to a photo online
Create your own night scene in the sky using this free photo editor
As the digital world evolves and the pandemic restricted travel, the desire to escape and explore is growing. For some people, that means planning a trip to space through their VR headsets. For others, it’s about embracing their connection with nature.
Photographs of natural environments such as the sky are making appearances on Instagram, TikTok, and Pinterest mood boards. The celestial theme is likely to be a photography trend in 2022, but we all know that capturing the Milky Way or perfect cotton candy clouds on your smartphone isn’t that easy.
That’s why today we’re sharing with you a secret photo editing hack you’ll wish you discovered light years ago... ⚡
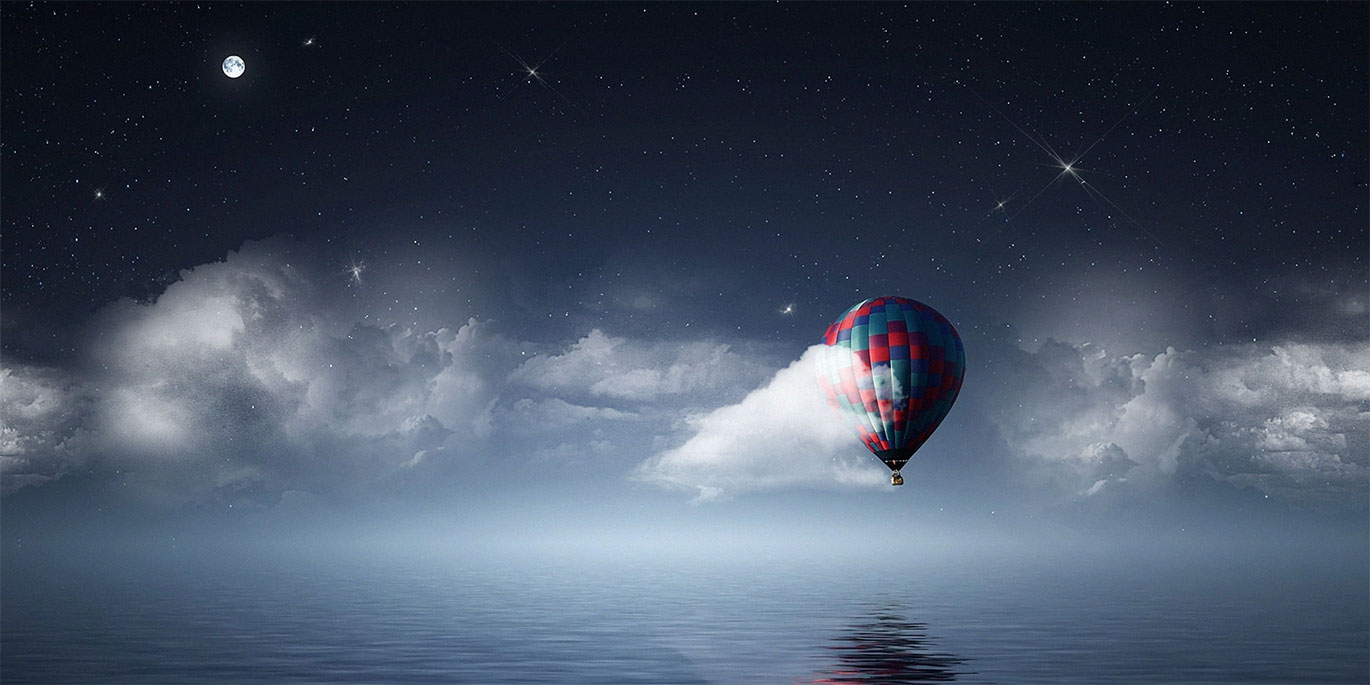
Create the starry sky you dream of at night ✨
How many times have you tried to capture the night sky with your mobile phone’s camera and the photo turned out blurry? Photographing in low light conditions can be tricky, especially if you live in a city with light pollution and don’t have a camera tripod.
The good news is you don’t need to be a professional photographer to get the night scene of your dreams. With a free photo editor like iLoveIMG, the sky's the limit.
Add stars and clouds to photos using this free App
You can add a star or a group of stars and clouds to your sky photography using the iLoveIMG Photo Editor. The free app allows you to edit the photo background to create your own custom sky patterns without any Photoshop skills needed.
Follow these steps to create beautiful images in seconds to impress your social media #skylovers and download them with high quality - no ads or watermarks! 💫
How to add stars to a photo with iLoveIMG
This guide will show you how to add eye-catching white stars to dark backgrounds to create your own stunning night scene:
- Go to the iLoveIMG Photo Editor.
- Select the photo you want to edit from your computer.
- From the top toolbar, click on Stickers.
- In the Sticker Menu, select Stars.
- Select the type of star you want to add to your photo, then click Apply.
- Click to drag and drop the star into position on the photo or readjust its size.
- When you’re done, click on the Save button to download your edited image.
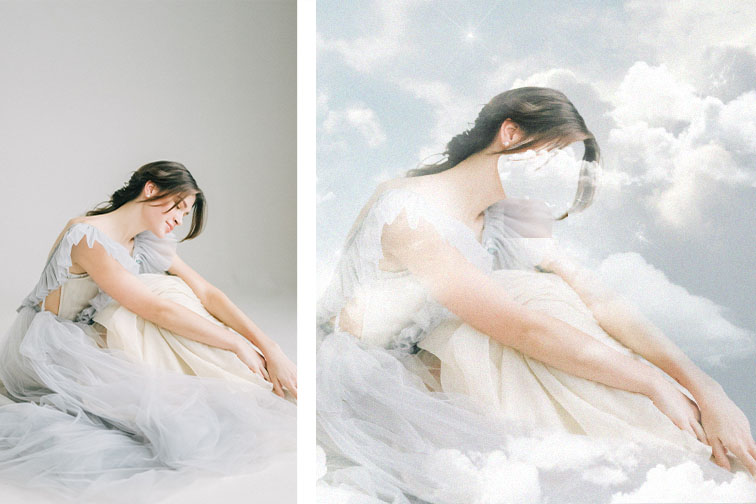
How to add clouds to a blue sky for free online
You can also create a scene in the clouds using the Photo Editor. Here’s how to add real clouds to a landscape to create a more dramatic weather effect:
- Go to the iLoveIMG Photo Editor.
- Select the photo you want to edit from your computer.
- From the top toolbar, click on Stickers.
- In the Sticker Menu, select Clouds.
- Select the type of cloud you want to add to your photo, then click Apply.
- Click on the cloud to adjust its size and position on the photo.
- Add extra layers to create the cloudy look and feel you desire.
- When you’re happy, hit the Save button to download your image, then share it in your #cloudstagram! ⛅
Customize your image with more photo effects
Now that you know how to create your own sky map and cloudy themes, you can show your social media followers your new graphic design skills. If you want to add even more cool effects to your photos, iLoveIMG offers loads more photo editing tools to make your pics glow.
Use the free Photo App to adjust the background color, opacity and exposure of your photos, or make photo collages using different brush tools and stickers. To learn how, read our post, “How to draw on photos and add stickers”.

